Saturday 11 April 2015

Sabudana kheer

This Navratri I discovered this dish which many love to have during the fasting period. Initially I was surprised to know that any such kheer does exist,but once I tried making it,I knew from now this will be in my favourite list. I generally prefer making sabudana Wada,but kheer is something new and innovative way to look out for. This kheer is very rich in texture and something different from the regular rice kheer pudding we all make.

Ingredients

1. Sabudana(sago) - 1/3cup(standard measurement)
2. Full cream milk - 1 litre
3. Green cardamom - 2 nos
4. Chopped nuts for garnishing
5. Sugar - 1/4 cup(standard measurement, add more if you like sweeter,I prefer mild sweet)

Method

Soak sabudanas in water for 3-4 hrs,just enough to soak,don't add excess water else it will get soggy. Boil milk,simmer till it reaches half the volume. Now add sago,green cardamom(torn) and simmer in low flame for 8-10 mins,till the sago is soft but firm giving a rich texture. Add sugar,simmer till it dissolves. Serve cold or in room temperature and garnish with chopped nuts.

Spicy fusion eggs

Weekends are the days when I feel equally lazy and still want to have the best food of the week. Cricket has taken up quite a lot of time,earlier the World Cup and now the ongoing IPL. Somehow I feel watching in the stadium must be so much fun,specially when you see so many of your friends end up seeing a match in the stadium itself. This year I badly want to see one from the stadium,cheering and absorbing the euphoria around. Let's c!
Coming to the dish,I just blended some different taste in one dish to experiment and the result was lip smacking. It's easy and fast to make giving me more time to enjoy being with family 😀

Ingredients

1. Hard boiled egg - 4 nos
2. Onion - 1 medium size chopped
3. Ginger - 1 inch finely chopped
4. Garlic - 3 thick pods finely chopped
5. Tomato - 1 medium size chopped
6. Tamarind pulp - 1 tsp(I used the ready available Dabur homemade paste)
7. Sambhar powder - 1 tsp
8. Garam masala powder - 1/2 tsp
9. Mustard oil - 3tsp approx
10. Turmeric powder - 1/2 tsp
11. Red chilly powder - 1/2 tsp
12. Coriander powder - 1/2 tsp
13. Cumin powder - 1 tsp
15. Salt to taste

Method

Half the boiled eggs and keep aside.
Heat oil in a non-stick pan and fry onion,ginger,garlic,till oil separates. Now add tomato and fry till oil starts separating. Mix in turmeric powder,red chilly powder,cumin powder,coriander powder,fry for few secs and add little water. Now layer the eggs,with cut side facing down,simmer,cover and cook for 2mins. Dissolve tamarind pulp in small amount of water and add to the egg curry,mix well. Now add sambhar powder,garam masala powder,salt and cook in low flame for few seconds. Serve hot with chapati or paranthas.


Thursday 19 March 2015

Simple okra(bhindi) fry

Spring is coming late in our region,but I guess we all are loving and enjoying the extended lovely cold weather. Visiting the vegetable markets is so much fun during this season that I never miss a chance to go for some green shopping. This week when I was there in the market filling my bag with the endless options of vegetable and fruits,I found a small heap of okra displayed for sale. The first glance of it made me realise that summer is now not too far and the cold weather will be gone very soon,but Mr S loves eating bhindi so much that the mere sight of it made me smile. So in a way it was a yippee moment for him when he noticed that I was staring at the heap of bhindi,hehehe. 
To welcome bhindi in our palette this season I thought of making this simple but very tasty dish out of it.

Ingredients

1. Bhindi - 250 gms
2. Turmeric powder - 1 tsp
3. Red chilly powder - 1 tsp
4. Amchur powder - 2 tsp
5. Rice flour - 4tsp
6. Salt to taste 
7. Mustard oil for frying

Method

Wash the bhindis and pat dry. Remove the edges and slit lengthwise. In a mixing bowl place bhindis, except oil,add all the ingredients,mix well and keep aside for 15 mins. Heat oil in a frying pan and shallow fry the bhindis till done. Serve hot with chapatis or paranthas. 


Monday 23 February 2015

Kache gosht ki dum biryani

Sunday's are the only day when Mr S can have his food comfortably,weekdays are always in a hurry with the phone ringing quite often. I like to take that extra effort on this day whenever we are at home and have not gone out. Although this recipe has many ingredients but is not complicated as I always prefer making things as simple as possible.

Ingredients

For marination of mutton

1. Mutton raan - 500gms(try to get tender and fresh mutton,they cook softer and better)
2. Curd - 150gms
3. Onion - 1big size
4. Ginger - 1 inch
5. Garlic -6 pods(thick ones)
7. Star anise - 1 no
8. Mace - 1 no
9. Green cardamom - 4 nos
10. Cinnamon - 1 inch
11.cloves -4 nos
12. Cumin seeds - 2 tsp
13. Coriander seeds - 1 tsp
14. Turmeric powder - 1 tsp
15. Red chilly powder - 1/2 tsp
16. Black pepper- 10 nos
17. Big cardamom - 1 no
18. Mustard oil - 2 tbsp
19. Tomato - 1 big

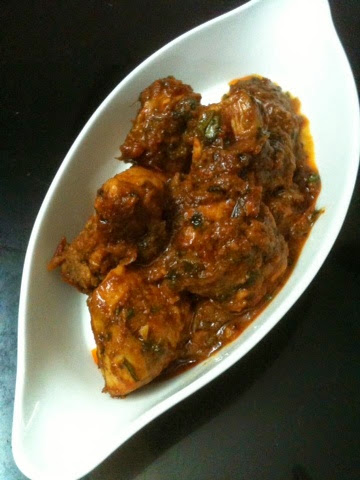
Dry roast star anise,mace,green cardamom,cinnamon,cloves,cumin seeds,coriander seeds,black pepper till they start releasing aroma. Cool and make a paste of the roasted spices along with tomato,onion,ginger,garlic,big cardamom. In a mixing bowl place mutton,add the paste,curd,turmeric powder,red chilly powder, oil and mix well. Marinate the mutton overnight or at least 6 hrs.

Ingredients for rice

1. Basmati rice - 2 cups(standard measurement)
2. Green cardamom - 2 nos
3. Cinnamon - 1 inch
4. Cloves - 2 nos

Boil water along with the spices and add rice,salt to taste.Cook till they are three fourth done. Drain and keep aside.

Some more ingredients

1. Onion - 1 big size julienned
2. Desi ghee - 3 tbsp 
3. Beetroot grated - 4 tsp
4. Atta dough  for sealing the lid


Method and assembling

In a heavy bottomed vessel,add ghee and fry the onion till they are dark brown in colour. Meanwhile mix salt to the marinated mutton,keeping in mind that salt has also been added to the rice. Place a roti Tawa on flame and heat it. Once the onion is browned take the vessel of the flame and layer it with the mutton along with the entire marination.now top it with rice and spread evenly. Spread the grated beetroot over the rice as it will give some wonderful colour to it. Apply the atta dough on the outer circle of the lid and press it firmly on the vessel tsp prepare it for the dum. Make sure that no steam escapes and the lid is properly sealed. Now put this vessel on the Tawa which is already on flame,lower the flame to low and cook for at least 1.25 hrs(1 hour 25 mins) . Serve hot with raita or mirchi ka salan.

Note - finely chopped pudina can also be added along with beetroot for more flavour.

Friday 13 February 2015

Making roti in a rotimaker

I was gifted a rotimaker almost two years back,and I hardly used it as I was not able to make roti in it properly. I was also amongst many of us who thought that making roti in it can never be fruitful. Since this winter it was very cold for a long period,dolling our roti in the traditional way was getting difficult for me as often my finger use to go numb while preparing dough manually and then dolling out chapatis the traditional way. It was then that the thought of preparing chapati in a rotimaker and kneading dough in the food processor cropped up. Now I have almost excelled in it and thought of sharing my tips and tricks with so many people like me who always dread of making chapatis.

A key note which I suggest one should always keep in mind is,use exact measurement, always. It helps and will always give good result.

Ingredient

1. Atta - 1cup
2. Water- 2/3cup( 70%of atta)
3. Oil -1/2 tsp
4. Salt -1/4 tsp( or as per taste)
Note - I doubled the amount of all to make 12 rotis,amount being perfect for my food processor.

Method

I use my Philips food processor,in it I first added atta,salt,oil and pulsed for 10 secs. Now I added water and I pulsed for 30 secs. Voila dough is done in a flat 40secs time. Divide into 12 balls and keep it covered so they don't dry,preferably with a wet cloth or tissue paper.
Now heat the roti maker till the red indicator turns off,it means it's completely heated for use.
Now flatten a ball of the dough little bit and press, I press the rotimaker twice to get the proper shape and size. Flip sides and continue do so 6-7times ,keeping each side for 10-20secs till you see brown bubbles starts forming. Lower the upper flap and lovely roti will slip out automatically. 

While packing for lunch boxes,rub small amount of ghee else they tend to stick to each other.


Saturday 1 November 2014

Couscous veg pancake

Sundays are always meant to laze around and I am no different either. This is also a day where I like to cook different and more variant of dishes, as you can eat them at your own ease and time with no rushing for time and work. Since I am a late riser and love to sleep more in the mornings,I prefer to keep breakfast easy,fast,simple and something different on Sundays. This is a simple,complete nutrition packed breakfast and can be a good stuff in the tiffin boxes for kids. I am seriously now planning to buy a DSLR camera as I feel it's definitely required for good food pictures. Anyways the taste and the nutrition is much better than the picture posted of the dish.

Ingredients

1. Couscous - 1 cup
2. Semolina - 1/2 cup
3. Maida - 1/2 cup
4. Chopped Spinach - 1/2 cup 
5. Chopped carrot- 1/3 cup
6. Eno fruit salt - 1 sachet
7. Salt to taste

For the tempering

1. Mustard seeds - 2 tsp
2. Cumin seeds - 1 tsp
3. Curry leaves - 12
4. Red whole chilly -  1 no

Method

Mix couscous,semolina,flour with some water to make a thick batter. Let it rest for 15 mins. In the meanwhile you can chop the veggies. Add some more water as the mixture will thicken,cos the couscous and semolina will swell up. Make the tempering in some oil and add to the mixture,mix with a an egg whisker. Now add eno fruit salt,salt and the veggies. Heat small amount of oil in a non stick pan,take 1 ladle of the mixture and spread with the help of a spoon. Once the pancake gets almost cooked,it should be golden brown in colour,flip and cook from other side too. To check if it has cooked properly insert a fork,it should come out clean. The flour makes it crispy outside,whereas the semolina and couscous keeps it soft inside. Serve hot with sauce or any chutney. 

Kashmiri style red chicken curry

Winter is making it's way slowly in Noida. This is no doubt the best time for the people here,who have braved the blazing heat for so many months. Even if we are at home or offices the blaring sound of AC,coolers and fans are never friendly for the ears and mind. For me sipping tea in the evening is now a much more enjoyable moment as the flavour of the tea maximises when their is a slight chill in the air. Few days back I was surfing TV channels while enjoying my evening cuppa and happened to see "Madhu Jaffery " cooking show. It was showing some mutton recipe cooked in a traditionally Kashmiri way,which the chef was describing as her mother's own recipe. I liked the way she was explaining the cooking method and talking about Kashmiri food. Although in the entire episode the use of a special Kashmiri spice mix powder was shown,but the ingredients were never given out. So I made this recipe my way but following the basic technique which was shown by the woman.

The main technique used here is slow cooking,basically the masala is being roasted for a very long time and it's this prolonged cooking which gives the recipe it's distinctive flavour. The recipe was originally made with mutton but I made it with chicken as it was available in my fridge that time.

Ingredients

1. Chicken - 300 gms
2. Onion - 1 big size chopped
3. Ginger - 2 inch chopped
4. Garlic - 6 thick cloves chopped
5. Cumin powder - 1 tsp
6. Coriander powder - 1 tsp
7. Turmeric powder - 1/2 tsp
8. Curd - 3 tbsp
9. Tomato - 2 medium size chopped
10. Salt to taste
11. Mustard oil - 4 tbsp
12. Kasuri methi - 3 tsp
13. Garam masala powder - 1tsp
14. Coriander - 3 tsp chopped
15. Red chilly powder - 1/2 tsp
16. Kashmiri red chilly powder - 2 tsp

Method

Marinate the chicken with turmeric powder,cumin powder ,coriander powder,1 tbsp mustard oil,garam masala powder and keep aside. In a wok heat the remaining oil and add onion,fry in low flame till they turn pink in colour, now add ginger garlic and fry,after some time add tomatoes and fry till they start leaving oil. Now here all the magic starts,add small amount of water and keep frying on low flame till oil separates. Repeat this procedure several times till the masala turns into dark red colour and almost turns into a paste.every time the masala starts releasing oil add small of water and fry again till oil separates. This needs quite a lot of patience and little skill too as you may have to increase the flame while adding water and again lower it down while frying. After almost 35 mins or when the masala has changed into a darker colour,add 1 tbsp curd along with Kashmiri red chilly powder and fry till oil separates,repeat till you have used the entire curd. Now add the marinated chicken,salt and slow cook,covering it and stirring occasionally till the chicken is cooked through. If required add very small amount of water. Now crush kasuri methi in your palms and add to the chicken. Stir fry for 1 more minute. Add chopped coriander giving a final stir and serve hot with roti/naan/paranthas or even rice.